
The important thing to remember about this fly is that it is a pattern so you should tie it in a wide variety of sizes and colors. My advice go out to where you are fishing and simply copy color combinations that you see! Good Luck and tight lines.
Materials:
Thread: 8/0, to match body color
Hook: dry fly sizes 10 to 18
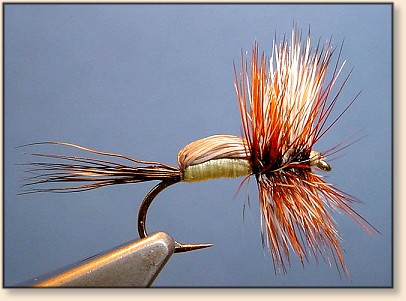
Tail: Moose.
Body: Thread.
Overbody and wing: Elk cow.
Hackle: Silver Saddle, furnace and grizzly.
Tying Instructions: Humpy
1. Start the thread halfway at the hook shank. This is important, as it is the reference point for the body. Wrap to the bend, tie in tail, wrap to halfway point. (*You can use 6/0, but I've found that 8/0, because of its smaller diameter, "bites" into the material better than 6/0.)

2. Take a bunch of Elk, remove all underfur, stack well, size (correct size is from tip of the tail to hook eye), and cut to length.

3. Tie the Elk to the hook, wrap towards the bend, keeping the Elk on top of the hook. Wrap until you've completely covered the thread wraps for the tail. Never mind the stubs at the tie-in point - they will disappear later on.

4. Wrap the underbody with thread. Pray that it doesn't break, which happened to me... Lift the Elk, give it a quarter turn, fold it over and tie down on top of the hook shank. This should be at the halfway point. After three thread wraps I lift the wing and put two wraps under the wing around the shank, then three wraps over the wing again. I finish with one wrap around the shank only.

5. Divide the wing, put thread wraps around the base of each wing, post the wings. Lay a thread foundation in front of the wing, making a smooth taper towards the eye. Without this thread foundation the hackle will be all over the place due to the big difference in diameter behind and in front of the wing.

6. Tie in the hackle(s), dull side facing forward. Don't tie the hackle down where the barbs start; leave a short length of bare stem, which will produce a cleaner start of the hackled collar. The ugly spot, where the thread broke, will be covered with the first wrap of the furnace hackle.

7. Palmer the hackles forward, starting with the hackle that was tied in last (here: the grizzly one). Tie off hackles and whip finish.
Did you take those pics?
ReplyDelete